The Epson V850 is the default scanner for photographic prints, and the only scanner equipped to digitize slides and photographic negatives. Always wear clean cotton gloves when handling any kind of graphic material. Do not leave fingerprints.
| Table of Contents |
|---|
Set up scan job
...
- Turn on computer.
- Create top-level folder in the local storage or external hard drive. Name the folder after the reference code for fonds or collection.
- Create a hierarchical directory of sub-folder(s) named after physical boxes and/or folders within the fonds or collection. See Appendix B - Guiding principles for file naming and file organization for guidance on organizing and naming files created by the scanner.
- Press the power button on bottom left corner of scanner front panel:
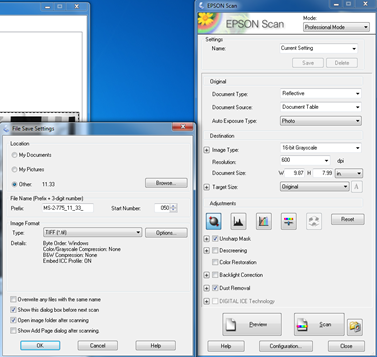
- Launch Epson Scan software
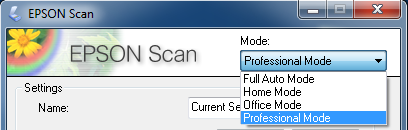
- Ensure Epson Scan is set to “Professional Mode”:
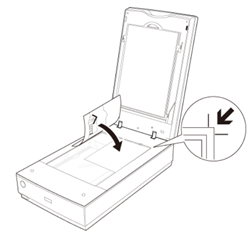
- Set the technical specifications for the scan job. See Appendix C - Technical specifications for "master" files for guidance determining specifications for each format.If the scan job involves slides or negatives, remove the document mat:


The scanner is equipped with five plastic holders for photographic slides and negatives. If the scan job involves slides or negatives, select the appropriate holder:- 35 mm slide holder
- 35 mm filmstrip holder
- Medium format film holder
- 4 x 5 in. film holder
- Film area guide
Scan photographic prints
...
- Place photographic print face down on scanner bed, ensuring that white document mat is attached.
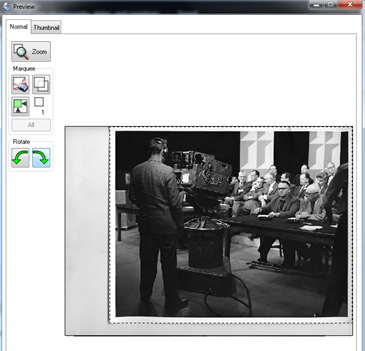
- Click “Preview" button:

- Check the auto crop. Adjust cropping and rotating as necessary.
- Click “Scan,” and use the pop up window to select destination folder, file name and start number, and image format.
Scan 35 mm slides
...
Side of slide
...
Finish
...
Text orientation
...
Emulsion side
(photo-sensitive side)
...
Matte – image “pops” out like engraving
...
Backwards
...
Non-emulsion side
(non-photo-sensitive side)
...
Gloss – shiny, reflective coating
...
Forewords
...
Scan 35 mm negatives
- Follow the instructions for digitizing slides except use the 35 mm negative holder instead of the 35 mm slide holder.
The “first” negative in the sequence should be positioned in the top right corner of the holder and the “last” negative should be positioned in the bottom left corner of the holder (i.e., images are sequenced top to bottom, right to left): Clip the top plate onto the holder when all 35 mm filmstrips are in position.