/
Create image of 5.25 inch floppy disk
Part of the Dalhousie Libraries Documentation Wiki
Create image of 5.25 inch floppy disk
Introduction
- Archives staff create images of 5.25 inch floppy disks with specialized equipment:
- Newtronics D509V5 5.25 inch floppy drive
- Floppy drive controller (FC5025 or KryoFlux)
- Forensic workstation
- BitCurator machine
- Windows 10 FTK machine
- Newtronics D509V5 5.25 inch floppy drive
- The FC5025 is the preferred floppy controller.
- Guymager is the preferred tool for creating forensic images on the BitCurator forensic workstation.
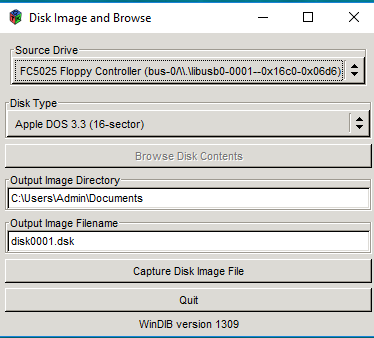
- DeviceSide Data "Disk Image and Browse" is the preferred tool for creating forensic images on the Windows 10 FTK machine
- Review the installation guide for the Device Side Data FC5025 floppy controller and the installation guide for the KryoFlux floppy controller before completing the following procedures.
Choose hardware and software configuration
- Choose the appropriate hardware and software for the project. Considerations include:
- Type of floppy disk (single-side or double-side)
- File system of 5.25 inch floppy disk(s)
- Choice of floppy controller (FC5025 or KryoFlux)
- Choice of operating system (Windows 10 or BitCurator environment)
- Choice of forensic imaging software (Device Side Data "Disk Image and Browse" or FTK Imager or Guymager)
- Typical configurations include:
- FC5025 in Windows 10 (FRED)
- FC5025 in BitCurator environment
- KryoFlux in Windows 10 (FRED)
- KryoFlux in BitCurator environment
- See the Digital Archivist for guidance.
Setup FC5025 and 5.25 inch floppy drive
- Connect 5.25 inch floppy drive to its power cable. Connect power cable to power supply.
- Position floppy drive so it can remain connected to its power supply and also connect to the forensic workstation via the FC5025.
- Connect IDE cable to FC5025. The red line in the cable should be close to the USB port.
- Connect "B" end of USB cable to FC5025.
- Connect IDE cable to floppy drive.
- Connect "A" end of USB cable to USB port in the forensic workstation.
- The green power light on the floppy drive should be on.
Create forensic image with Guymager
- Connect the digital storage device to the computer.
- Connect 3.5 inch or 5.25 inch floppy drives via USB using the KryoFlux
- Connect 3.5 inch floppy drives via USB using the Device Side Data FC5025 floppy controller
- Connect 3.5 inch floppy drives via USB using the TEAC floppy controller
- Insert CD or DVD into drive
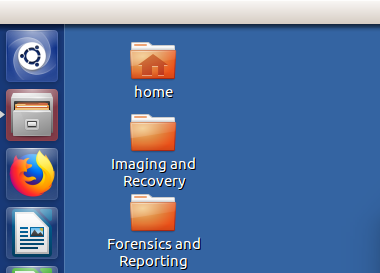
- Open the Imaging and Recovery folder.
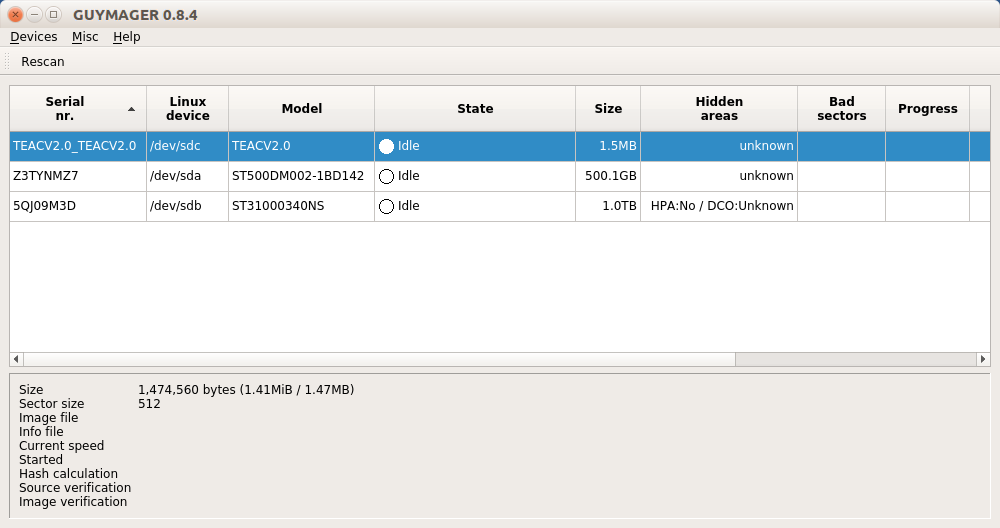
- Launch Guymager.
- Right click on the device and select "acquire image"
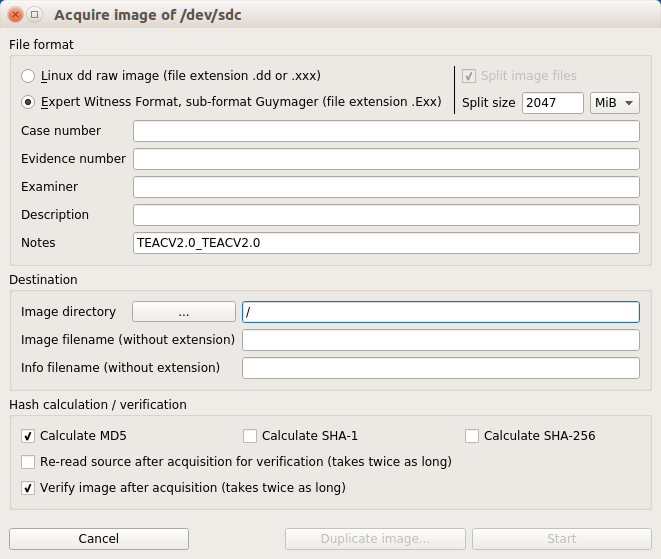
- Complete the form.
- Select Linux dd raw image
- Add accession number to case number field
- Add EvidenceID to Evidence number field
- Add name to Examiner field
- Add basic description to the Description field (could be adapted from the entry in the master list of digital storage devices)
- Add Destination info
- Image directory (Evidence/Evidence - master\accession)
- Use the EvidenceID for the image file name (without extension)
- Use the EvidenceID for the info file name (without extension)
- Select option to calculate MD5
- Select option to verify image after acquisition
- Click on duplicate image button and complete Duplicate image settings. Be sure to change image directory to "Evidence - copy"
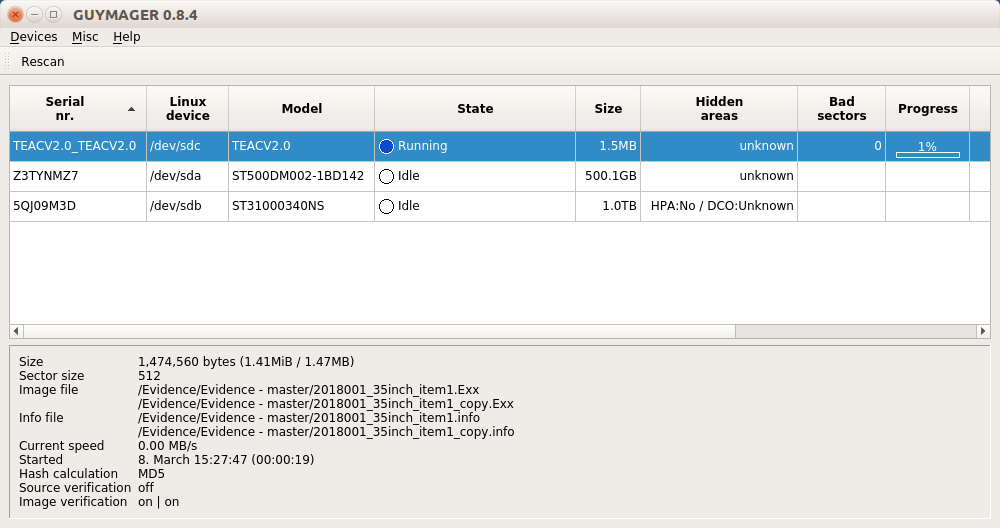
- Click on "Start button"
- Review info files after imaging process is complete.
- fghg
Create forensic image with Device Side Data Disk Image and Browse software
- Launch Disk Image and Browse.
- The source drive should automatically default to "FC5025 Floppy Controller).
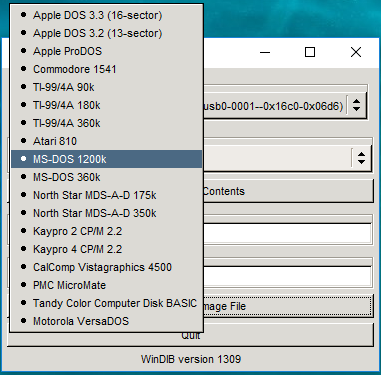
- Select the appropriate disk type from the drop-down list.
- For more information about each disk type, see the setup and installation guide for the Device Side Data FC5025 floppy controller.
Related content
5.25 inch floppy disks
5.25 inch floppy disks
More like this
3.5 inch floppy disk
3.5 inch floppy disk
More like this
Create image of 2.5 inch SATA hard drive
Create image of 2.5 inch SATA hard drive
More like this
Digital forensics workflow - 5.25 inch floppy disks
Digital forensics workflow - 5.25 inch floppy disks
More like this
Device Side Data FC5025 floppy controller
Device Side Data FC5025 floppy controller
More like this
Create image of optical media
Create image of optical media
More like this
