/
9.7 Transfer digital files into Archivematica
9.7 Transfer digital files into Archivematica
- Creighton Barrett
Owned by Creighton Barrett
Last updated: Apr 25, 2019
Assemble standard transfer
- Coming soon.
Archivematica Transfer tab
- Select Standard transfer from the Transfer type drop-down list.

- Provide a name for the transfer (use name of top-level directory, which should be derived from unique reference code).
- Provide accession number.

- Select top-level folder in Locations Transfer Source. Click the "Add" button.

- The filepath to the transfer folder should appear above the drop-down list of Transfer Source Locations.

- Click on the "Start Transfer" button. Large transfers may take several minutes to initiate.
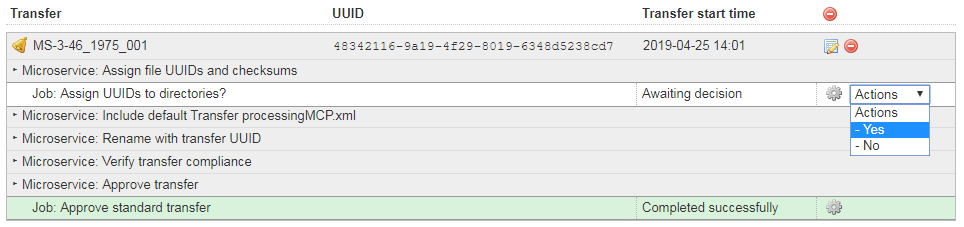
- Complete the "Approve standard transfer" job within the "Approve Transfer" microservice. Select "Approve transfer" from the drop-down list.

- Complete the "Assign UUIDs to directories?" job within the "Assign file UUIDs and checksums" microservice. Select "Yes" from the drop-down list.
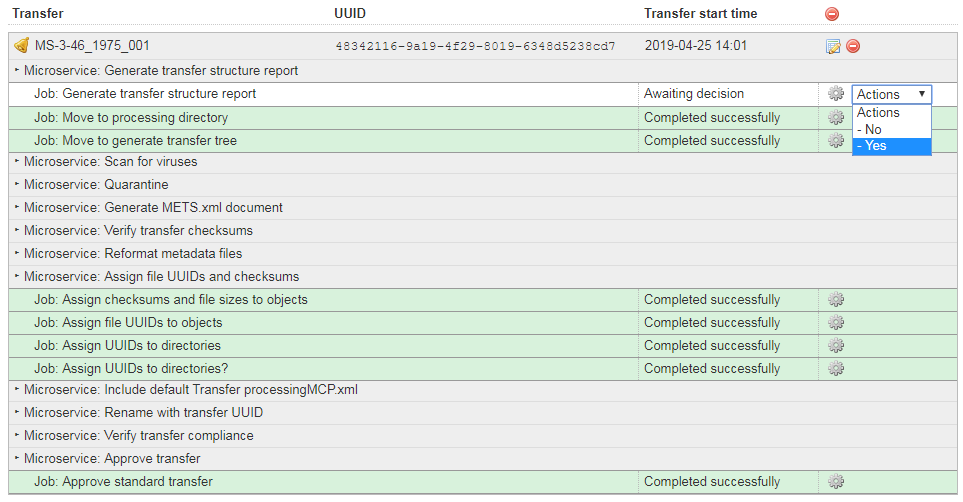
- Complete the "Generate transfer structure report" job within the "Generate transfer structure report" microservice. Select "Yes" from the drop-down list.
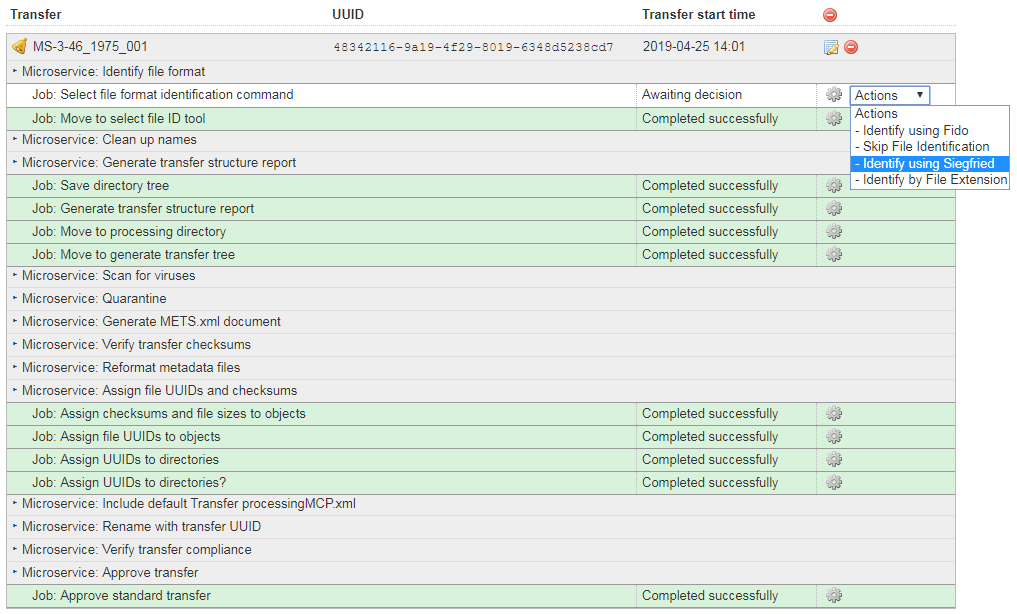
- Complete the "Select file format identification command" job within the "Identify file format" microservice. Select "Identify using Siegfried" from the drop-down list. This job may take several minutes for large transfers.
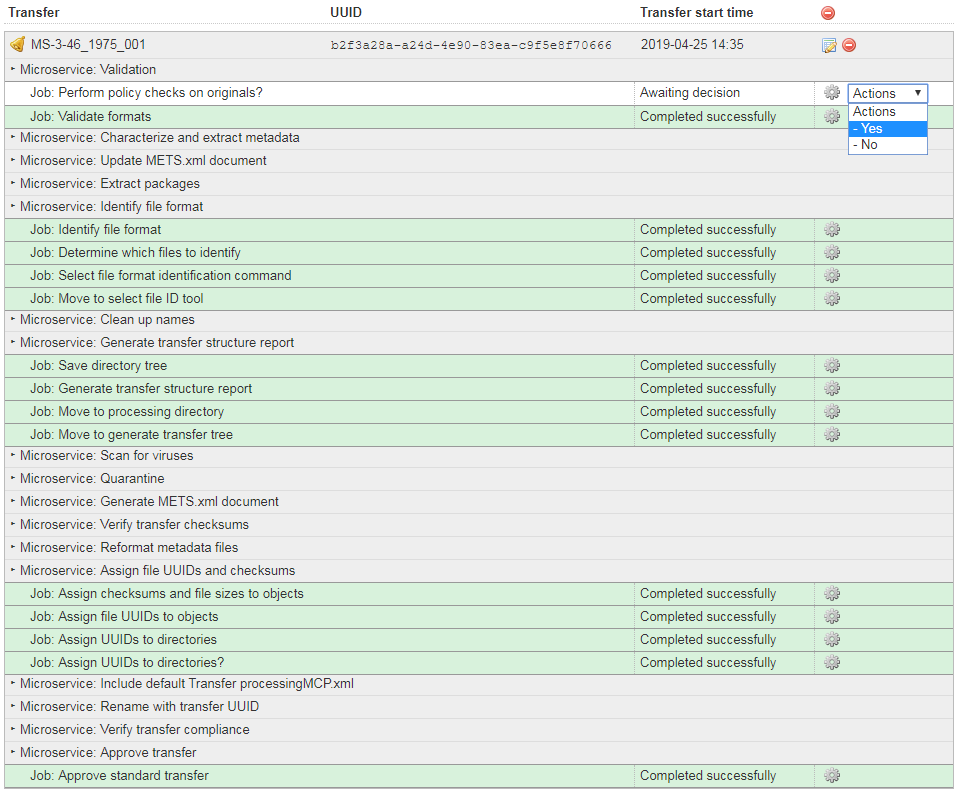
- Complete the "Perform policy checks on originals?" job within the "Validation" microservice. Select "Yes" from the drop-down list.
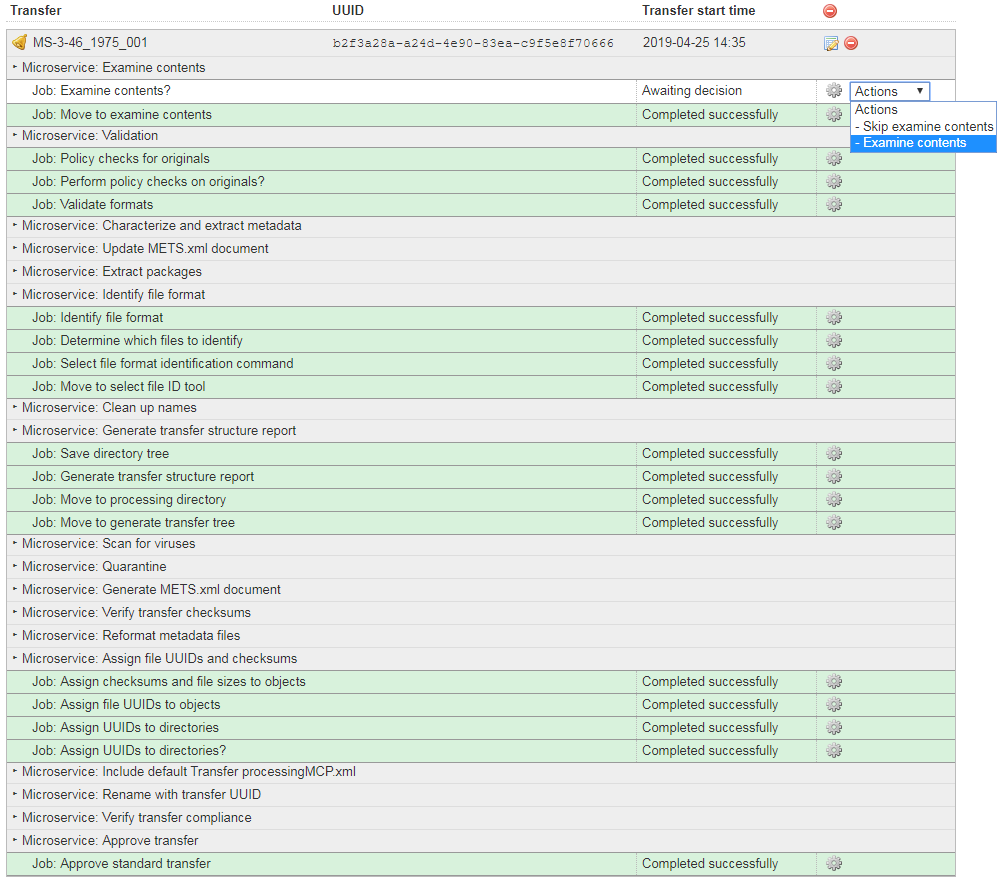
- Complete the "Examine contents?" job within the "Examine contents" microservice. Select "Examine contents" from the drop-down list. This job can take several minutes if the transfer is large.
- Complete the "Create SIP(s)?" job within the "Create SIP from Transfer" microservice. Select the "Create single SIP and continue processing" option in the drop-down list. Note: if the transfer will not be ingested at this time, select "Send to backlog" option from the drop-down list.

- The SIP will now be ready to Ingest at the Ingest tab.

, multiple selections available,
Related content
Archives services
Archives services
More like this
Publish archival descriptions
Publish archival descriptions
More like this
Create a new draft archival description
Create a new draft archival description
More like this
Mandatory metadata elements for file- and item-level descriptions
Mandatory metadata elements for file- and item-level descriptions
More like this
Guiding principles for accessioning
Guiding principles for accessioning
More like this
Recording statistics
Recording statistics
More like this